1. 概述
流程图作为流程的图形化展示的重要部分,需要在设计器外的地方显示出来,这时有两种方式的显示办法:
- 在服务端通过流程定义XML生成流程图
- 在前端加载流程定义XML展示
本方案我们采用第二种方式,通过使用跟设计器一样的bpmn-js的组件进行流程图的显示。
引入bpmn-js 显示组件并封装
在Jpaas-vue项目中通过安装以下组件:
npm install bpmn-js
在Vue页面中定义如下:
<template><div style="width:100%;height:100%" class="flowImg"><div style="padding: 10px">温馨提示:按住鼠标左键可拖动查看</div><div class="containers" ref="content"><div class="canvas" ref="canvas" style="width: 100%;height: 100%"></div></div></div></template><script>import BpmnViewer from 'bpmn-js/lib/NavigatedViewer'import {getBpmnXmlFromParam} from '@/api/bpm/core/bpmImage'export default {name: "BpmImageView",props:{instId: String,taskId:String,defId:String},created() {let self=this;this.$nextTick().then(() => {this.canvas = this.$refs.canvas;if(!this.viewer) {this.viewer = new BpmnViewer({container: this.canvas,keyboard: {bindTo: window},});}//从后台xml中获取getBpmnXmlFromParam({defId:self.defId,instId:self.instId,taskId:self.taskId,showHis:true}).then(result=>{if(!result) {return;}this.viewer.importXML(result.bpmnXml, function(err) {if (err) {console.log('error rendering', err);} else {console.log('rendered');}self.shows();// 加上节点的高亮显示let canvas = self.viewer.get('canvas');if(canvas && result.histories!=null){for(let i = 0 ; i < result.histories.length;i++){canvas.addMarker(result.histories[i].nodeId, 'highlight_' + result.histories[i].checkStatus);}}});});});},methods:{shows () {}}}</script><style scoped>.containers{height:calc( 100% - 44px );width: 100%;}.containers>>> .bjs-powered-by{display: none;}.example {display: inline;height:32px;width:30px;padding:2px;border: solid 1px #c09853;margin:2px;}.flowImg >>> .highlight_AGREE:not(.djs-connection) .djs-visual > rect{fill:green !important;}.flowImg >>> .highlight_BACK:not(.djs-connection) .djs-visual > rect{fill: #ff174c !important;}.flowImg >>> .highlight_UNHANDLE:not(.djs-connection) .djs-visual > rect{fill: #ff1005 !important;}.flowImg >>> .highlight_HANDLE:not(.djs-connection) .djs-visual > rect{fill: #ff680a !important;}.djs-container > svg{overflow: auto!important;}</style>
展示效果
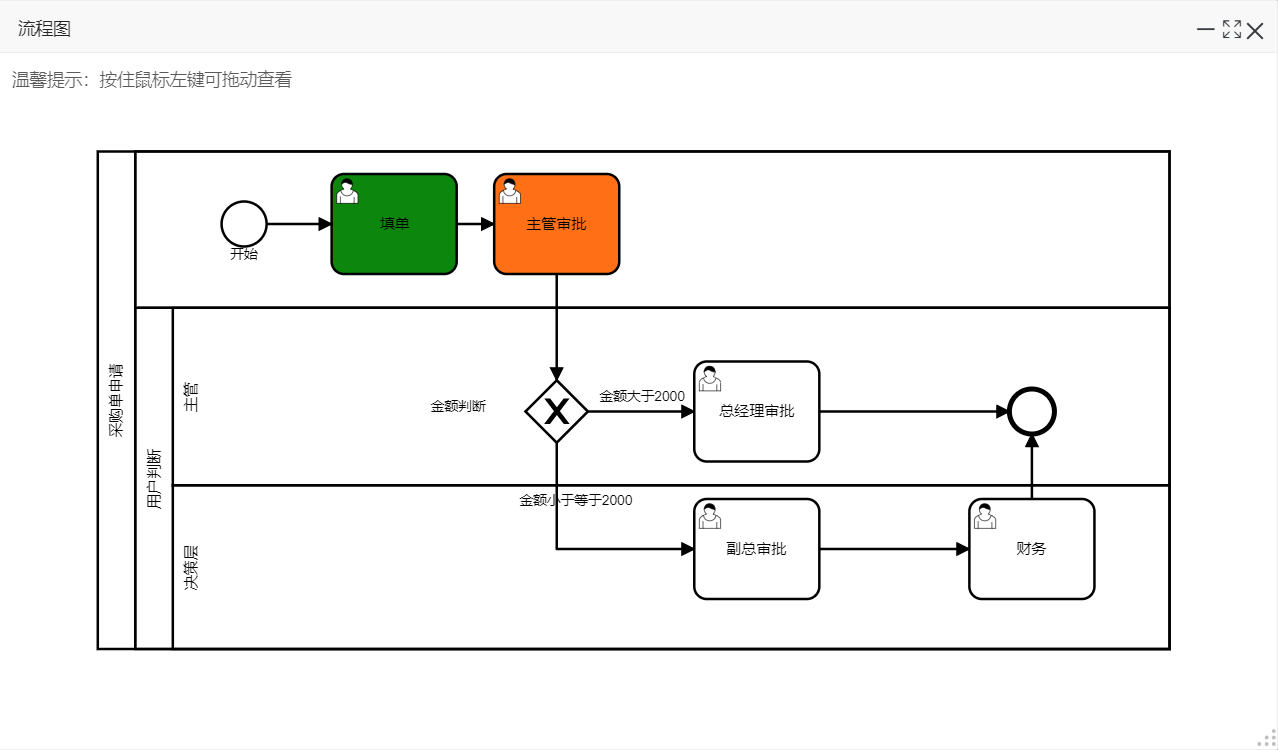
可定义不同的节点的不同的审批状态显示不同的颜色风格。
文档更新时间: 2020-10-12 09:25 作者:csx